
Create Your Perfect Duolingo Avatar: Step-by-Step Guide
Creating a personalized avatar on Duolingo is a fun and engaging way to enhance your language-learning experience. Your avatar represents you in the app, making your journey feel more unique and motivating. Whether you’re a casual learner or a dedicated polyglot, customizing your avatar allows you to express your personality and style. This step-by-step guide will walk you through the process of designing your perfect Duolingo avatar, from choosing the right features to unlocking special accessories. Get ready to bring your virtual self to life and make your language-learning adventure even more enjoyable!
Create Your Perfect Duolingo Avatar: Step-by-Step Guide
1. Accessing the Avatar Customization Feature
To begin creating your perfect Duolingo avatar, you first need to access the avatar customization feature. This can be done by opening the Duolingo app or website and navigating to your profile. Look for the Edit Avatar option, usually represented by a pencil icon or a similar symbol. Clicking on this will take you to the customization screen where you can start personalizing your avatar.
2. Choosing the Right Base Model
Once you're in the customization screen, the first step is to select a base model for your avatar. Duolingo offers a variety of base models that differ in skin tone, body shape, and gender. Choose the one that best represents you or aligns with how you want to be perceived in the Duolingo community. This base model will serve as the foundation for all further customizations.
See AlsoChinese Sleeper Train What Do I Need To Know3. Customizing Facial Features
After selecting your base model, you can move on to customizing the facial features of your avatar. This includes options for eye shape, eyebrow style, nose shape, and mouth expression. Take your time to experiment with different combinations until you find the look that feels most like you. Remember, these features can significantly impact the overall appearance of your avatar.
4. Selecting Hairstyles and Accessories
Next, you can choose from a variety of hairstyles and accessories to further personalize your avatar. Duolingo offers a wide range of options, from short and long hair to hats and glasses. You can also select different hair colors to match your real-life appearance or to express your unique style. Accessories like earrings and scarves can add an extra layer of personality to your avatar.
5. Finalizing and Saving Your Avatar
Once you're satisfied with your avatar's appearance, it's time to finalize and save your creation. Review all the customizations you've made to ensure everything looks just right. When you're ready, click the Save button to apply your changes. Your new avatar will now be visible on your profile and will represent you in all Duolingo activities, including leaderboards and discussions.
See AlsoWhat Should Duolingo Add: User Suggestions for Improvement| Step | Action | Details |
|---|---|---|
| 1 | Access Avatar Customization | Navigate to your profile and click on the Edit Avatar option. |
| 2 | Choose Base Model | Select a base model that matches your skin tone, body shape, and gender. |
| 3 | Customize Facial Features | Adjust eye shape, eyebrow style, nose shape, and mouth expression. |
| 4 | Select Hairstyles and Accessories | Choose from various hairstyles, hair colors, and accessories like hats and glasses. |
| 5 | Finalize and Save | Review your customizations and click Save to apply your new avatar. |
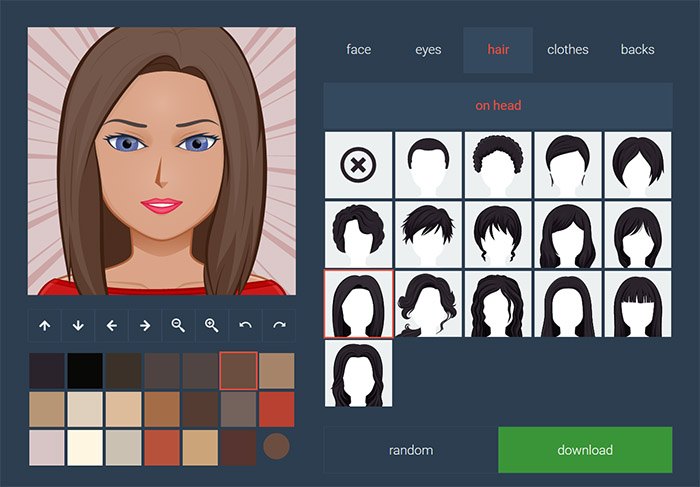
How to design your avatar in Duolingo?
![]()
How to Access the Avatar Customization Feature in Duolingo
To design your avatar in Duolingo, you first need to access the customization feature. Follow these steps:
- Open the Duolingo app on your device or visit the website.
- Log in to your account or create one if you don’t have it yet.
- Navigate to your profile section by tapping on your current avatar or profile icon.
- Select the “Edit Avatar” option to enter the customization menu.
Choosing Your Avatar’s Appearance
Once you’re in the avatar customization menu, you can start designing your avatar’s appearance. Here’s how:
See AlsoSpaced repetition isn’t rote learning- Select a skin tone that matches your preference or identity.
- Choose a hairstyle from the available options, including different lengths, colors, and textures.
- Pick facial features such as eyes, eyebrows, and mouth shapes to personalize your avatar further.
- Add accessories like glasses, hats, or jewelry to make your avatar unique.
Customizing Your Avatar’s Outfit
Duolingo allows you to dress your avatar in various outfits. Follow these steps to customize your avatar’s clothing:
- Browse through the clothing options available in the wardrobe section.
- Select a top, such as shirts, sweaters, or dresses, that suits your style.
- Choose a bottom, like pants, skirts, or shorts, to complete the look.
- Add shoes and other accessories to enhance your avatar’s outfit.
Unlocking Additional Avatar Features
Some avatar features in Duolingo are locked and require achievements or in-app purchases. Here’s how to unlock them:
- Earn gems or lingots by completing lessons and maintaining streaks.
- Visit the shop section to purchase exclusive outfits or accessories.
- Participate in special events or challenges to unlock limited-time avatar items.
Saving and Updating Your Avatar
After designing your avatar, make sure to save your changes and update it whenever you want. Here’s how:
See AlsoSensible Chinese character learning revisited- Once you’re satisfied with your avatar’s design, click the “Save” button to apply the changes.
- Return to the avatar customization menu anytime to update your avatar’s look.
- Experiment with new styles and accessories as you progress in your language learning journey.
How can I create my own avatar?
Choosing the Right Avatar Creation Tool
To create your own avatar, the first step is to select the right tool or software. There are various options available, ranging from simple online platforms to advanced software. Here are some key points to consider:
- Online Avatar Makers: Websites like Bitmoji, AvatarMaker, and Canva offer user-friendly interfaces for creating avatars quickly.
- Graphic Design Software: Tools like Adobe Illustrator or Photoshop provide more customization options for detailed avatars.
- Mobile Apps: Apps such as Zepeto and FaceQ allow you to create avatars directly from your smartphone.
Designing Your Avatar's Appearance
Once you've chosen a tool, the next step is to design your avatar's appearance. This involves selecting features that represent you or your desired persona. Consider the following:
See Also12 ways chatting online will improve your Chinese- Facial Features: Choose eye shape, nose, mouth, and hairstyle that match your preferences.
- Clothing and Accessories: Pick outfits, hats, glasses, or jewelry to personalize your avatar.
- Color Scheme: Decide on a color palette that reflects your personality or brand identity.
Customizing Your Avatar's Personality
An avatar is not just about looks; it can also reflect your personality or the character you want to portray. Here’s how to add personality to your avatar:
- Expressions: Select facial expressions like smiling, winking, or serious looks to convey emotions.
- Poses: Choose dynamic or relaxed poses to make your avatar more engaging.
- Backgrounds: Add a background that complements your avatar’s theme or story.
Exporting and Using Your Avatar
After creating your avatar, you’ll need to export it in the right format and use it across different platforms. Follow these steps:
- File Formats: Save your avatar in common formats like PNG, JPEG, or SVG for versatility.
- Resolution: Ensure the resolution is high enough for clear display on websites, social media, or print.
- Integration: Use your avatar as a profile picture, in presentations, or as part of your branding materials.
Updating and Refining Your Avatar
Your avatar can evolve over time to reflect changes in your style or preferences. Here’s how to keep it updated:
- Regular Updates: Modify your avatar periodically to keep it fresh and relevant.
- Feedback: Seek feedback from friends or colleagues to improve your avatar’s design.
- Trends: Stay updated with design trends to ensure your avatar remains modern and appealing.
Frequently Asked Questions From our Community
How do I start creating my Duolingo avatar?
To begin creating your Duolingo avatar, open the Duolingo app and navigate to your profile section. Look for the option to customize your avatar, which is usually represented by a small icon or button. Once you click on it, you'll be guided through a step-by-step process to select features like hairstyle, skin tone, clothing, and accessories. This allows you to design an avatar that reflects your personality or preferences.
Can I change my Duolingo avatar after creating it?
Yes, you can change your Duolingo avatar at any time. Simply go back to your profile settings and select the option to edit your avatar. From there, you can modify any aspect of your avatar, such as updating its appearance, changing outfits, or even selecting new accessories. This flexibility ensures that your avatar can evolve alongside your language-learning journey.
Are there any limitations to customizing my Duolingo avatar?
While Duolingo offers a wide range of customization options, there are some limitations. For example, certain features or accessories may be locked and require you to achieve specific milestones, such as completing lessons or earning XP points. Additionally, the available options may vary depending on your device or app version. However, Duolingo frequently updates its avatar customization features, so new options may become available over time.
Why is creating a Duolingo avatar important?
Creating a Duolingo avatar is important because it adds a personal touch to your language-learning experience. Your avatar represents you in the app, making the process more engaging and fun. Additionally, customizing your avatar can serve as a motivational tool, as some features are unlocked by completing lessons or reaching goals. This gamified approach encourages consistent learning and makes the journey more enjoyable.
Leave a Reply
Related Posts